SMT Soldering Practice

For as long as I can remember I’ve always enjoyed reading instruction manuals for new devices, appliances, and gadgets. I love being able to troubleshoot when problems arise or find that one extra feature by pressing a specific combination of buttons. In the same vein, repairing and modifying small electronics has always been an interest of mine. Having the ability to solder in replacement components when something fails or fix loose connections always gives me great satisfaction with the added benefit of saving money and keeping waste out of the landfill.
In an effort to keep my soldering skills sharp and improve on them I recently ordered a SMT (Surface Mount Technology) practice kit. I have experience soldering small components but this kit provided a more in-depth understanding of the sizes, technique, and challenges of working with components of this size.
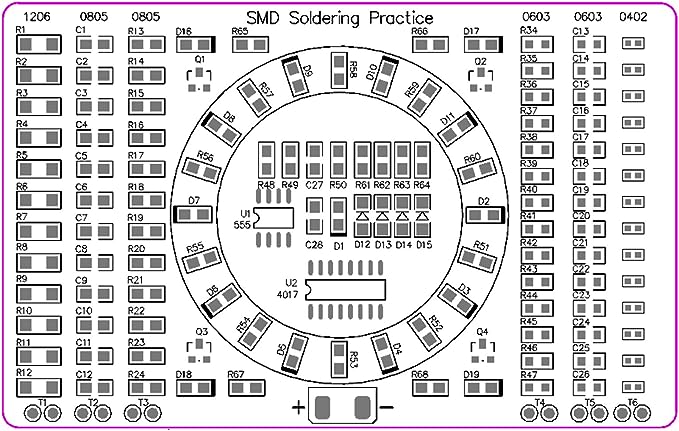
Jumping into the kit I started with the largest components which are 1206 size resistors. These resistors went on rather smoothly using the familiar technique of heating the contact pad and component to flow solder through both locations. Applying a liberal amount of flux aided in getting a good solder joint. I could already feel that my soldering iron was too large for this type of soldering making it difficult to get the appropriate amount of solder in the joint. Sometimes not enough solder and often times too much solder. However, I pressed on with the practice kit.

Next, I soldered on a row of 0805 size capacitors along with a row 0805 resistors. The size of my soldering iron continued to increase the challenge but I was confident I was still achieving good solder joints.
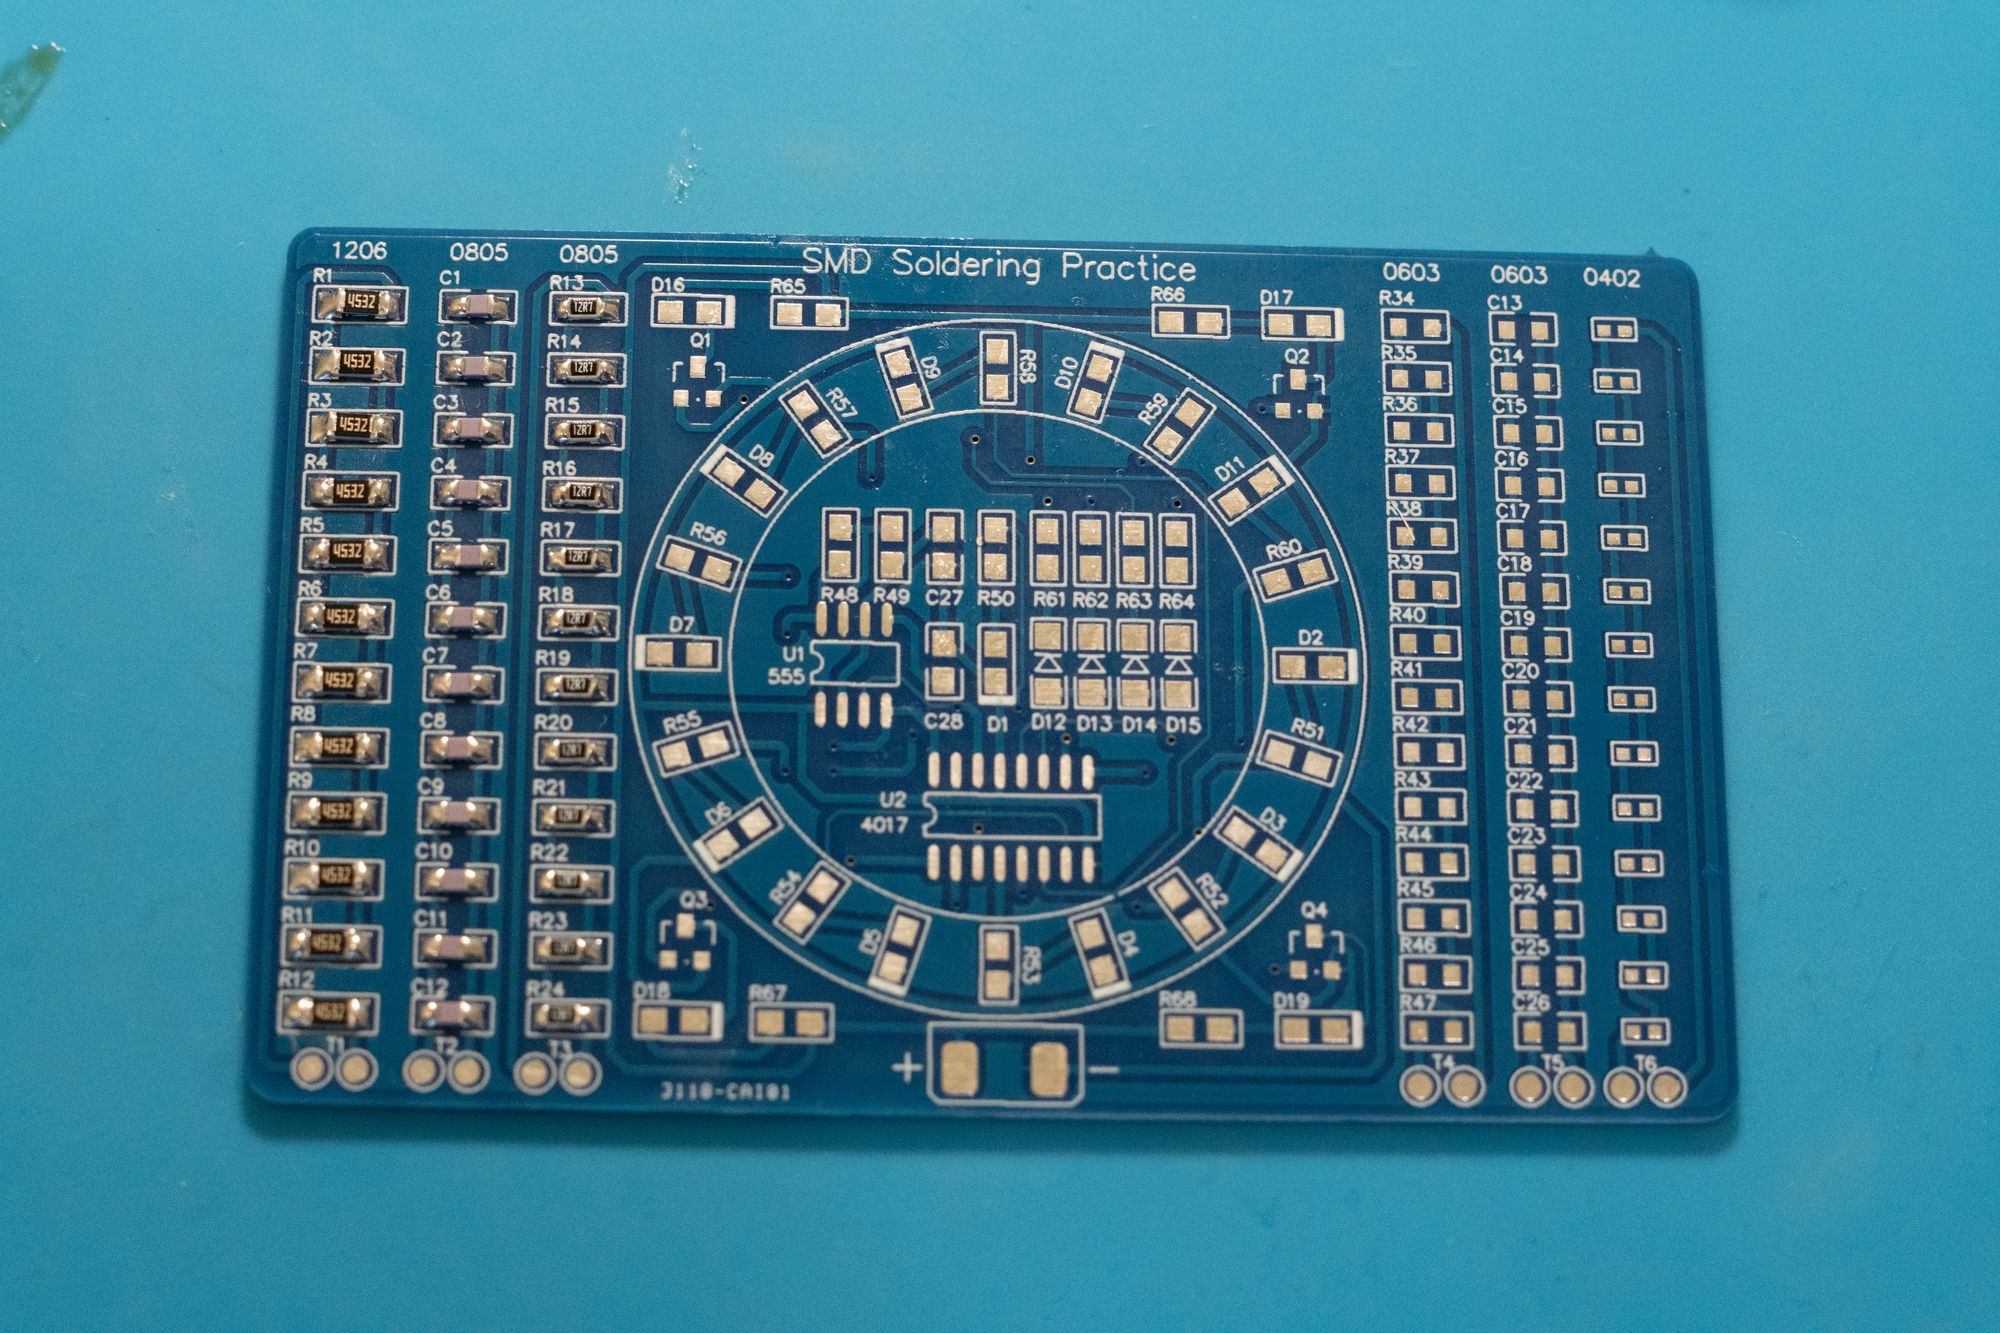
The difficulty started to ramp up moving to the other side of the board as I began soldering in a row of 0603 size capacitors along with a row of the same size resistors. I still felt like I didn’t quite have the right tool for the job but was continuing to achieve satisfactory soldering joints on the rows of components.
I moved on to the final row of practice resistors: size 0402. These resistors felt considerably smaller than the other components up to this point. I felt prepared to meet the challenges of working at this size, such as heating both sides of the component and losing contact with the PCB altogether. While I did run into more difficulties working with these smaller components, I was able to solder them all to the board successfully.
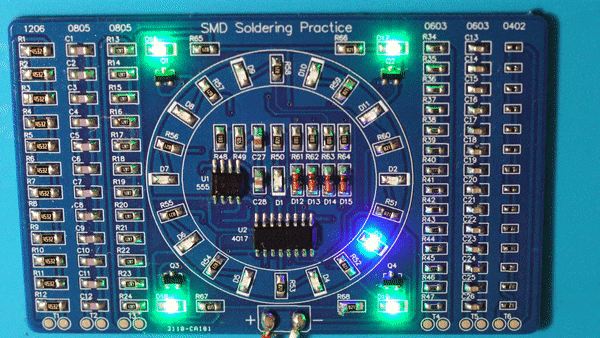
The final challenge of this practice board was creating a working circuit featuring new components such as LEDs, diodes, and ICs. I was excited to complete this portion and get to see the results of my work. After soldering in all the components, I scavenged an old USB cable and stripped the power supply wires to power my newly made circuit. I was happy to see the circuit working correctly and display my success in the form of some flashing lights.
Overall, this was a really fun project. I achieved a better understanding of the techniques and challenges of working with SMT components. Moving forward I would invest in a smaller and more precise soldering iron if I’m going to be working with more components of this size. Having a better suite of tools including a scope would make assembling SMT PCBs much easier and would likely result in a more robust outcome.